El Sueno Mission Again for Alternate Ending Is Unavailable Please Leave Mission Area to Restart
| This article (or department) refers to content in the Enhanced version for the PlayStation iv, Xbox Ane and PC release of Grand Theft Car Online that may be absent-minded from other versions. For a complete list of the features of the Enhanced version for the PlayStation 4, Xbox One and PC version of 1000 Theft Auto Online, please see here . | |
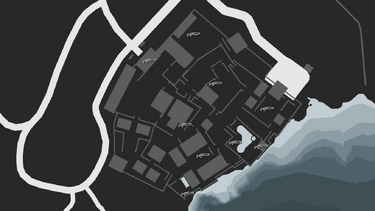
The Cayo Perico Heist finale is a heist mission featured in G Theft Auto Online equally part of The Cayo Perico Heist update. It is the concluding mission of The Cayo Perico Heist strand.
Contents
- 1 Overview
- ii Finale Screen
- ii.1 Approach Vehicle
- 2.2 Infiltration Indicate
- two.3 Compound Entry Bespeak
- two.4 Escape Point
- 2.5 Time of Twenty-four hours
- 2.6 Weapon Loadout
- 2.7 Rent Support Crew
- 2.eight Assign Coiffure Cuts
- 2.9 Go on
- iii Mission Walkthrough
- iii.1 Isle Infiltration and Compound Entry
- 3.1.1 Ambitious approach
- three.1.two Big Con approach
- 3.1.iii Stealth approach
- 3.ii Primary Target
- three.3 Secondary Targets
- 3.4 Escape
- 3.5 Guard Beliefs
- 3.half dozen Collectible Weapons
- iii.1 Isle Infiltration and Compound Entry
- four Aftermath
- four.1 Madrazo Files
- 4.2 Repeat Heists
- 4.3 Replay on Hard Fashion
- 5 Rewards
- five.1 Primary Target
- 5.two Secondary Targets
- v.iii Total loot
- 5.iv Elite Challenge
- five.v Awards
- 5.6 Unlocks
- 6 Gallery
- 6.1 Infiltration
- 6.2 Demolition
- 6.3 Compound Entry
- 6.4 Looting
- vi.four.ane Chief Targets
- vi.iv.2 Secondary Targets
- 6.five Weapons
- six.6 Support Crew
- 6.7 Escape
- 6.eight Miscellaneous
- 6.9 Video Walkthrough
- seven Changes
- 8 Trivia
- nine Bugs/Glitches
- ten References
- xi Navigation
Overview
The mission focuses on players visiting Cayo Perico later on completing all mandatory grooming missions that unlocks the finale, in order to steal their primary target from within El Rubio's Chemical compound. Although the program for the heist must be designated when showtime it, but the approach method and weapon loadout are locked in. One time the players arrive on the island they have freedom to tackle the heist in a multifariousness of manners, similar to the Aggressive, Stealth, or Big Con approaches of The Diamond Casino Heist. In one case the mission begins, the protagonist'due south main objectives are to enter the compound, reach the basement below the role, steal the primary target, escape the compound, and then escape from the island.
When players initiate the heist, they tin choose to complete the mission solo, or be joined by up to 3 other players - the latter option increases the maximum potential payout when seeking out secondary targets. All equipment found during the Gather Intel mission will be marked on the players maps, and any undiscovered items can still exist found, assuasive every member of the crew to pick up an individual detail if required. Players can as well secure additional items in the compound that provide access to new opportunities or some of the secondary targets available in the mission. Once the primary target is found, players will face increased difficulty in securing additional loot items, as they will face additional guards and will be sought out past Strickler manning the minigun in his Valkyrie MOD.0 upon leaving the compound, until the crew makes for their opted escape route.
Weapon Wheel admission is limited to the chosen loadout, with the additional heavy weapon Supply Drib adding to it. While undiscovered, killed guards may driblet ammunition and snacks, but their weapons will non be able to be looted. If the warning is raised and the guards are using their weapons, their weapons can be looted and will be added to the role player'due south weapon bike for selection. Up to 3 boosted weapons can also be collected within the compound.
The final payout of the heist is determined by the Primary Target (which increases past 10% on Difficult Mode), just on the value of the secondary targets that the crew secured. Secondary boodle is dropped if players are shot by guards or accept to respawn subsequently being killed (with the exception of the condom cash), and the primary target will be dropped if the histrion carrying information technology is killed.
Finale Screen
" Hither it is. The big screen! You see everything you lot have discovered on the island so far... all locations, all tools, all entry and exit points, all equipment.
Hither yous tin also rent some reinforcements... air support, sniper support, reconnaissance drone. Once everything is in place, hit the large push button, and we go! Alone, with accomplices... this is up to you. "
— Pavel'south briefing on the planning screen.
Here you can preview the effect of your scoping and Prep work. Press Start to begin The Cayo Perico Heist lone, or invite other players.
Players access the heist from the planning screen in the Kosatka. The finale is available once the mandatory preparations are completed, only players tin opt to continue performing optional set up-ups or another intel gathering before initiating the finale.
On the finale screen, the actor is required to brand selections on the following:
Approach Vehicle
" Of course, we must decide our approach. How we volition get in that location? "
— Pavel
Lists all vehicles they accept secured during the preparation missions, provided they encounter the requirements.
- Kosatka (Heist Prep: Kosatka required)
- RO-86 Alkonost (Heist Prep: Alkonost & Heist Prep: Pilot required)
- Velum five-Seater (Heist Prep: Velum required)
- Annihilator Stealth (Heist Prep: Stealth helicopter & Heist Prep: Pilot required. Also needs 1 of the two drop zones found during the intel gathering.)
- Kurtz 31 Patrol Boat (Heist Prep: Patrol Boat required)
- Longfin (Heist Prep: Longfin required)
vehicle to apply to infiltrate through the perimeter of the island
Infiltration Point
" How practise we become aground? Which infiltration bespeak will you utilise? "
— Pavel
Which point of entry to the isle, may be restricted depending on which approach vehicle was selected, some can be over-ridden once on approach.
- West Beach (Kosatka only)
- N Dock
- Principal Dock
- HALO Jump (Alkonost merely)
- Airstrip (Velum 5-Seater only)
- N Drib Zone (Annihilator Stealth only)
- South Drop Zone (Annihilator Stealth but)
- Drainage Tunnel (Kosatka only) (Heist Prep: Cutting Torch required)
Compound Entry Point
" Now, crucial question... how practice yous get inside the compound? Of course, if you lot have the correct tools along the way, you have more options. "
— Pavel
Available entry points at the start - can exist changed on the fly when boosted equipment is nerveless on the island.
- Primary Gate (Heist Prep: Demolition Charges required)
- Drainage Tunnel (Heist Prep: Cutting Torch required)
Escape Bespeak
" At present, as long as y'all are live, how will you leave? Which escape route? "
— Pavel
Available leave points - tin can be changed on the wing during the heist.
- Airstrip - A Dodo plane volition be marked on the map.
- North Dock - A Dinghy boat will be marked on the map.
- Primary Dock - Same as above.
- Kosatka (merely if the Kosatka is selected every bit the approach vehicle) - The Kosatka will be marked on the n of the island, regardless of which infiltration indicate is selected.
Time of Twenty-four hour period
" Time of day tin can make all the difference to an operation. Choose wisely to support your strategy. "
— Pavel
Sets the fourth dimension of day.
- Twenty-four hour period - The crew will arrive at the island at 12:00 midday. Time will progress normally until seven:00 pm (nineteen:00) when it will freeze just before sunset to keep the isle in perpetual daylight for the residuum of the mission.
- Night - The crew will arrive at the island at 10:00 pm (22:00). Fourth dimension will progress unremarkably until 5:00 am when it volition freeze just before dawn to keep the island in perpetual semi-darkness for the remainder of the mission.
Weapon Loadout
The weapon loadout is pre-selected based on what preparation option was picked, just the histrion is at present given the option to purchase suppressors for $v,000.
Hire Support Coiffure
Support crew provides additional assistance to players during the heist. These can only be chosen for the heist when the thespian completes all the mandatory prep missions to activate the Finale, and require an upfront fee be paid for their services; some too require the player owns certain businesses before they can be used (i.e. Hangars for Airstrikes, Nightclubs and a Terrorbyte for Recon Drones). All just the Weapon Stash are available for employ on the island via the Interaction Carte, but require the player to first disable the island's air defenses for them to exist bachelor. The Weapon Stash is just available if the player chooses the Velum approach vehicle, and will take already completed their job when the player lands.
| Name | Image | Cost | Description |
|---|---|---|---|
| Airstrike |  | $12,000 | Charlie Reed drops a targeted airstrike from a P-996 LAZER on an area marked with a flare, very like to the Merryweather Airstrike service in freemode. Requires air defenses to exist disabled. |
| Supply Drib |  | $fifteen,000 | Unnamed character provides a Minigun and up to 9999 rounds, 5 RPGs, and v Sticky Bombs, per player dropped in a crate for players to collect. Requires air defenses to be disabled. |
| Sniper |  | $25,000 | Viktor Sokolov deploys to the island and silently kills guards of the players' choosing using a silenced Sniper Rifle. It is possible that he may miss some of his shots. Requires air defenses to be disabled. |
| Helicopter Backup |  | $thirty,000 | Rooster McCraw arrives in a Buzzard and his gunner attacks guards, cartoon enemy fire away from players. Requires air defenses to be disabled. |
| Recon Drone |  | $25,000 | Paige Harris provides a reconnaissance drone that reveals the positions of all guards on the island. Requires air defenses to exist disabled. Works inside El Rubio's Compound. Notation: Normal Mode shows the guards by default, this only becomes effective when playing a Hard Mode heist. |
| Weapon Stash |  | $fifteen,000 | Unnamed character stashes the players' selected loadouts in duffel bags in the hangar at the airstrip, preventing detection when using the Velum approach vehicle. Only works with the Velum arroyo vehicle. |
Assign Crew Cuts
" The safe hits the road, eh? Time to assign each crew member a cut of the cake. "
— Pavel
If there is more one player in the heist, the leader must assign a specific cutting to each participant (ready to 15%, the minimum cut).
Keep
" And then, we go! I will be on your headset, every bit always. Practiced luck, kapitan. "
— Pavel
Once the setup is complete, and all other players have marked themselves as set up, indicating credence of their cut, the leader tin can commencement the heist, at which point the mission begins.
Mission Walkthrough
Island Infiltration and Chemical compound Entry
One time the heist begins, the crew approaches Cayo Perico via the vehicle chosen by the leader. Infiltration points can be limited based on the arroyo vehicle selected.
- Kosatka: The Kosatka arrives off the perimeter of the island and shuts off its engines. The crew, wearing Scuba gear, descend from the Kosatka's Moon Pool entrance. From there, they are free to scuba dive to whatever landfall point they desire.
- Alkonost: The crew are on board the cargo bay of the Alkonost while the pilot controls it towards the isle and maintains cruise speed so they can choose when to jump. The airplane pilot will reiterate multiple instructions to jump before they are automatically out of the airplane. From at that place, players can theoretically state wherever they want (notwithstanding the difficulty of avoiding the chemical compound air defence "red zone").
- Annihilator Stealth: The coiffure are on board the rear bay of the Annihilator Stealth while the pilot approaches the island, reach the designated drop zone and lets the crew rappel down.
- Velum: The crew arrives to the island in a Velum 5-Seater and a guard inspects them. If weapons are stashed, the aforementioned cutscene from the Get together Intel prep mission plays and the crew remains undetected. If weapons are non stashed, however, another guard inspects them and alerts the other guards before being knocked out by the player.
- Patrol Gunkhole: The crew arrives in a Kurtz 31 Patrol Boat and are instructed to arrive at the designated dock. Nonetheless, players tin turn off and brand landfall anywhere they cull.
- Longfin: The coiffure arrives in a Longfin and are instructed to arrive at the designated dock. Again, players can plough off and brand landfall anywhere they cull.
Once on the island, their starting time objective is to reach the compound and gain entry, though they are costless to explore the isle for whatsoever Secondary Targets, secure any additional equipment, and perform some sabotage tasks.
- Air Defenses:
- Players must alienation a locked gate to access the chiffonier at the Control Tower and hack the counterpart circuits within to disable the air defenses everywhere on the island except the compound.
- CCTV cameras and lights:
- Players must breach a locked gate at the Cayo Perico Power Station and switch ii circuit breakers, cut the power. This will completely disable the CCTV cameras and subtract the size of the guards' vision cones. The power will merely be disabled until the players accomplish the compound, when Pavel will suggest that the CCTV has been brought back online. Thus, the ability will always be on inside the chemical compound and during the escape.
Entering the compound must be done via one of half-dozen entry points; how many are available to the players depends on what equipment they have collected upwardly to this point. How the entry betoken is used dictates the de-facto style of approach the coiffure can utilise to complete the rest of the mission:
Aggressive approach
- Chief Gate
- Demolition Charges are used to blow the outer Main Gate. A guard opens the inner gate and staggers out, dropping his weapon and collapsing. The players and then run through the gate into the chemical compound courtyard. The inner gate is re-closed by the time the actor regains command of their grapheme.
- The mission volition follow an Aggressive approach from that point onward, regardless of whether the crew avoided detection beforehand or are using the Guard Uniforms. Once Aggressive is commenced, the alarm is raised and there is no way to modify arroyo.
- Demolition Charges are used to blow the outer Main Gate. A guard opens the inner gate and staggers out, dropping his weapon and collapsing. The players and then run through the gate into the chemical compound courtyard. The inner gate is re-closed by the time the actor regains command of their grapheme.
Big Con arroyo
- Main Gate
- Supply Truck and Guard Uniforms, merely if all crew members have a uniform and ride the truck to the compound. Players get in at the mark in forepart of the Main Gate and honk the truck horn. A guard examines their disguise and waves them through the gate. Players are then safely inside the chemical compound with the Vetir parked on the south side of the gate with 3 neutral guards nowadays in the entry courtyard.
- From the moment the crew enters the Supply Truck in Guard Uniforms, they tin can avoid detection effectually the island, and within the courtyard of the compound. CCTV cameras turn white (neutral) and can be ignored. Guards retain a cone of vision which players tin safely laissez passer through, but they must not remain within the guards' view for too long.
- Players are not locked to using the Master Gate in one case they have bamboozled their way past the final checkpoint, and players can become out and access the compound using one of the stealth methods, whereby the approach volition switch to Stealth Approach.
- Supply Truck and Guard Uniforms, merely if all crew members have a uniform and ride the truck to the compound. Players get in at the mark in forepart of the Main Gate and honk the truck horn. A guard examines their disguise and waves them through the gate. Players are then safely inside the chemical compound with the Vetir parked on the south side of the gate with 3 neutral guards nowadays in the entry courtyard.
Stealth approach
- North and Southward Side Gates
- Entry requires a copy of the keypad codes which will be dropped past a random guard. Once the code is looted from the baby-sit, players tin can sneak to the side gate and access the keypad. The player attempts to enter the lawmaking using the keypad. They initially get it incorrect, but after a cursory thought process, they enter the right lawmaking and sneak through the gate.
- Occasionally, an alternative cutscene will play where, despite entering the code, an mistake is displayed on the keypad. The frustrated histrion hits the keypad with their fist, unlocking the gate.
- The guard can exist continuing immediately exterior the terminal checkpoint to the grounds but is usually inside the grounds immediately around the compound.
- Occasionally, an alternative cutscene will play where, despite entering the code, an mistake is displayed on the keypad. The frustrated histrion hits the keypad with their fist, unlocking the gate.
- Entry requires a copy of the keypad codes which will be dropped past a random guard. Once the code is looted from the baby-sit, players tin can sneak to the side gate and access the keypad. The player attempts to enter the lawmaking using the keypad. They initially get it incorrect, but after a cursory thought process, they enter the right lawmaking and sneak through the gate.
- North and South Wall
- Entry requires each crew member to accept nerveless a Grappling Claw to be able to climb the wall.
- Drainage Tunnel
- Heist leader has the Cutting Torch, cutting through the grill. They so swim a short distance to a vertical access grate and a curt cutscene plays as they open the grate and climb up the ladder into the compound.
- All members must exist present in the tunnel entry before admission will be granted. Players with maximum Lung Capacity skill should be able to cut the grill and gain admission without scuba gear without drowning. Team members without scuba gear tin can swim on the surface until the grate is cut by the leader to avoid running out of jiff during the cut process.
- Heist leader has the Cutting Torch, cutting through the grill. They so swim a short distance to a vertical access grate and a curt cutscene plays as they open the grate and climb up the ladder into the compound.
Primary Target
Once inside the compound, players next objective is to gain access to the basement vault, reaching one of ii entrances from their chosen entry point: Strickler's role; or an underground tunnel accessed past two separate locked gates. During this fourth dimension, the coiffure can learn two keycards, which are needed to enter the storage areas that hold the more valuable secondary targets, as well as a set of keys, which unlock the underground gates likewise as two shortcut gates between the Main Gate courtyard and the mansion tower providing additional paths. Regardless of which entrance into the vault the crew go for, both require the player to hack a fingerprint scanner - one member must correctly reconstruct fingerprints inside a time-limit or be forced to showtime over again; the others must protect this member during that fourth dimension. If accessing via the lift from the office, three (four in Hard Style) prints must be matched, while accessing through the hush-hush gates requires a single print match (2 in Difficult Style) at the additional scanner constitute there.
Upon entering the basement, the crew must go through a locked gate before they tin can accomplish the primary target, at which point, one member must tackle the job of acquiring the item, depending on its location, while the others protect them from the guards (if alerted):
- Safe - Pavel will text the coiffure the Safe Lawmaking that was stolen from the Head of Cayo Perico Security, consisting of three 2-digit numbers, which must be inputted correctly to open the prophylactic. If a number is inputted incorrectly, the thespian starts again.
- Display Case - The instance must be breached with the Plasma Cutter, in which a crew fellow member must carefully use the tool to access the target without overheating the cutter.
Regardless of whether their loot pocketbook is full of secondary targets or not, whatsoever crew member tin can bear the Primary Target, but will drib it if they are killed by the guards, forcing them or some other crew member to retrieve it, otherwise they cannot complete the mission.
Secondary Targets
Although the coiffure is gratis to get after every optional loot item that was located during the Gather Intel mission, each fellow member tin only carry a limited amount in their boodle purse; even if they become after one category, they can only secure a set amount before the bag is full and will non accept additional loot. Thus the full amount of all located secondary targets is unachievable by a crew of four players, forcing members to decide on which targets to acquire during the heist. However, the difficulty level of the mission does not bear on the value of each category of secondary targets.
If a actor conducts the Finale mission solo, they are restricted to stealing secondary targets from lock-ups around the island - cash and drugs. Virtually require the player to destroy the gate to these with Demolition Charges, explosives, or past shooting its lock with a gun, which will alert nearby guards (peculiarly if guns are not equipped with suppressors). The lock-ups can be opened silently by using a pair of bolt cutters or the Cutting Torch. However, 2 of the lock-ups have steel shutters which require ii players to bargain with them: 1 to keep the door open with a nearby lever, and the other to enter and collect the targets inside. All secondary targets within the compound are behind a dual keycard admission door, requiring ii players to take a keycard: one volition be dropped by a guard, and the other will be on Strickler'southward desk in the function. To open the doors, players must simultaneously enter their keycard. These sites will hold gold, paintings, or boosted stacks of cash. A solo run does accept the opportunity for players to steal at least one painting, provided it spawns in the role; otherwise, they are limited to looting the lock-ups around the island.
While players can determine how much they take from whatever stack of cash, drugs and gold, paintings tin simply be taken when fully removed from their frame.
Although not marked on the map, nor considered a secondary target, a random amount of cash is available in the hidden prophylactic in the part; like the chief target, this does not take up room in the boodle bag. This bonus is available to both solo and squad players.
Escape
One time the primary target is acquired, the crew's next objective is to escape from the compound, though they can freely rail downward any secondary targets they missed during this time. However, upon leaving the basement, a new shift of guards volition spawn around the compound and the island. The crew will only be able to leave the chemical compound via five routes:
- Main Gate - Bachelor to all players.
- Players attain the Main Gate and a small cutscene plays with them attempting to force information technology open, kicking it in frustration. They then see the green exit release button to the right of the gate, press it and escape from the chemical compound.
- Only the outer gate is destroyed in the Ambitious entry, and the inner gate is opened by the dying guard who staggers out. Players who blew the Main Gate to enter will still demand to unlock the inner gate to exit the compound.
- Players attain the Main Gate and a small cutscene plays with them attempting to force information technology open, kicking it in frustration. They then see the green exit release button to the right of the gate, press it and escape from the chemical compound.
- Northward and South Side Gates - Simply available if the codes were obtained outside the chemical compound prior to entry.
- The role player reaches a side gate and a small cutscene plays showing them entering a code; the display nevertheless says locked. The frustrated role player re-enters the code. The door unlocks and the player(s) leave the compound.
- North and South Walls - Only available if players have previously picked up a Grappling Hook each.
- Upon reaching the exit corona, the role player unpacks their grappling claw and throws it to the section of wall with damaged spikes. They so scale the wall and drop down safely outside the wall.
The crew must use ane of these routes, as they cannot utilise the Drainage Tunnel or the Supply Truck if these were used to enter the chemical compound. Attempting to jump off the compound balcony to swim away volition event in instant decease.
Subsequently leaving the compound, the coiffure'southward final objective is to get out Cayo Perico via ane of the available escape routes they tin can use, though they take time to seek out any secondary targets they missed. However, the latter determination is made tougher when they are a certain distance from the chemical compound, as all the island'southward guards volition exist assisted past Strickler, who will begin seeking out the crew with a Valkyrie MOD.0 attack helicopter, while the dock entry points will be patrolled by Weaponized Dinghies (albeit no gunners present). If the crew were detected by the guards by this betoken, the Valkyrie volition pursue and assault them, leaving members to either evade or attempt to disable the helicopter. Strickler is invincible and his helicopter cannot be destroyed either; later enough damage he will merely fly away. If the crew has remained undetected, the Valkyrie will search beyond the island for them, and only assault if information technology or the guards discover them. In addition, crew members volition not be able to avoid detection with baby-sit uniforms, as these become useless at this indicate.
Although the crew may use the escape route chosen by the leader, they can alter this if required. Each route will require the actor to do the following:
- Chief/N Dock - The crew must reach the dock and steal any of the boats there. All members must exist aboard, at which point the driver must pilot the vessel abroad from the island, while the other members attack any pursuers if they were detected.
- Note that any boat tin can be used for this method, not just the ones berthed in the docks. Players are free to hijack a Seashark, Jetmax, Dinghy or Squalo being used by civilians around the island, as well as a Weaponized Dinghy that they can take from pursuing guards on the h2o or sometimes seen on the docks.
- Airstrip - The crew must disable the island'south air defenses before they can go out. Once this is done, all members must lath an aircraft, with the pilot flying away from the island. If the players arrived in the Velum 5-Seater, information technology will still exist there, otherwise Dodo seaplanes will be at that place.
- Submarine - The crew must reach the Kosatka, which will be waiting for them underwater off the island's north coast. This road can simply exist used if the crew's leader used the Kosatka equally an approach vehicle on the heist.
- Swimming - It is too possible to simply swim away from Cayo Perico without using whatever vehicles, and the heist will succeed one time all coiffure members get far enough away from the island. If players arrived in the Kosatka, they can scuba dive away.
- Although information technology is normally unmentioned during the Finale, the histrion can equip the rebreather using the gear key (D-Pad Right or default G on PC). If Nighttime Vision Goggles are selected as the mask pick, they instead are controlled with the gear key.
Guard Behavior
Guards and their cones of vision will exist shown on the players map/radar in Normal Way but in Hard Style they will just announced at close distances. The Recon Drone is required to bear witness guards further away. During the mission, the guards will initially exist unaware of the crew's presence, but volition observe them if they should enter their line of sight or make dissonance near them. If a player gets detected by a guard and is not taken care of quickly, the guard will shoot at the player, often alerting other guards. When this happens, an warning is given, and the crew is forced to bear an Aggressive arroyo for the heist, as guards volition continuously pursue crew members throughout the mission, with new ones spawning to replace those evaded or killed. Some guards will not detect the coiffure at all, depending on how they approach the heist: if they use the Longfin or Velum 5-Seater, certain guards at each vehicle'south respective entry betoken will not heighten the alarm; if the crew finds Guard Uniforms, they volition not be detected past cameras, and have limited protection from detection by guards across the island, while those in the courtyard of the compound will not raise the alert. Being spotted by the Personal Bodyguards or Heavy Gunner within the compound (marked with red cones of vision) volition render the disguise ineffective. However, using disguises will just work if the crew avoids acting aggressive to the guards, while they cannot remain disguised inside the compound upon going beyond the courtyard.
The players can encounter a Heavy Gunner within the compound who will be wearing heavy armor and wielding a minigun, marked by a red skull on the minimap. This baby-sit is one of El Rubio's personal bodyguards and always has an extended narrow cone of vision. He takes piddling impairment to the body and requires multiple shots to the head to exist killed, and he cannot be killed by a melee assail.
The time of 24-hour interval that the crew leader chooses for the mission impacts the vision range of guards: during the 24-hour interval, their line of sight is extended; while at night, information technology is reduced. If the crew chooses to disable the power station, all cameras on the island volition deactivate until the players enter the compound, and guards volition have their vision range reduced further if this is done during a night-time playthrough of the mission.
Guards are further impacted in how they bargain with the coiffure, depending on which Disruption missions that were completed successfully by the crew during the Preparations missions: disrupting supplies of weapons restricts guards from using college powered weapons; disrupting armor prevents guards from having any Body Armor, although the Heavy Gunner is not impacted; and disrupting air support prevents the guards using Buzzard Attack Choppers when the crew is detected. In add-on, if players managed to find and use cutting pulverization during the Gather Intel mission, guards will have reduced firing accuracy during the Finale mission.
Collectible Weapons
During the mission, information technology is possible for players to larn iii weapons from within the chemical compound:
- Pistol - Located in the safe in Strickler'due south function.
- Perico Pistol - Players must complete a random event effectually San Andreas, involving the looting of a guard from Cayo Perico who has passed out almost a guild or bar. Doing so will not only provide a small cash advantage, just likewise a pocket-size key which can only exist used in the Finale mission. The key unlocks a drawer on the desk in the office, where the weapon can be found. Once the thespian has found the fundamental, it will be bachelor to access the drawer on all future heists. On return to San Andreas, the player will have the pistol in their inventory.
- Combat Shotgun - Players must search around the chemical compound for the weapon, every bit it randomly spawns at one of a number of locations. It will spawn to a new site on a subsequent replays of the heist. It is not kept after the mission, but in one case collected it is unlocked for purchase and modification at Ammu-Nation.
| Map | |
|---|---|
 | |
| Location | Image |
| Leaning confronting a table near the large swimming puddle. |  |
| Leaning confronting the balcony railing near the pocket-sized pool. | 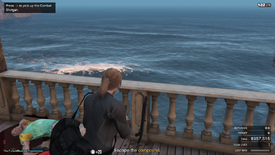 |
| Leaning confronting the pergola upright virtually the large pond pool. |  |
| Leaning against the circular physical planter in a courtyard northeast of the big pool. |  |
| Leaning confronting the walkway railing on the eastward side ground level of the main edifice. | 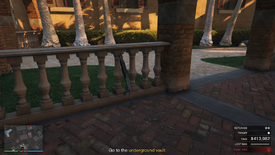 |
| Exterior the north entrance to the W Storage room |  |
| Leaning confronting a fountain on a grass lawn south of the principal puddle. |  |
| In the guard "belfry" above the main gate. |  |
| In the middle of the hedge maze in the northern corner. |  |
Aftermath
Upon escaping the isle, a cutscene will play.
Madrazo Files
The player will arrive at Miguel Madrazo'due south Mansion in Vinewood Hills where they will exist met at the gate by a guard. He volition let them in and Jorge will atomic number 82 them through to a party where Miguel Madrazo, Patricia Madrazo, Kaylee and Evan will be seen, forth with other political party guests. The role player volition requite Miguel the document canister. Jorge and then pays the histrion. Miguel calls Martin Madrazo to announce the success, only for his begetter to hang up on him when he suggests this success should let him to re-open discussions on a crypto deal or a condo projection. Miguel suggests the player continue to rob Strickler repeatedly and that Jorge will act as a fence for any hereafter heists.
Miguel then opens the document canister and expresses cloy at the content, throwing them onto the fire pit. The player tin run across a Marriage Depository memo and a salacious photo of Patricia and Trevor Philips.
The heist will so be complete and a short cutscene of the player and Miguel doing a tequila shot on the courtyard balcony, the latter throwing away his lime. If there were multiple players taking role in the heist, Miguel volition not exist present for the tequila scene. The player(s) will spawn back into free way at the gate of Miguel's mansion with the payment in their cash fix to exist banked.
Echo Heists
The player will hand over the loot handbag to Jorge and be handed an envelope in payment. The tequila shot cutscene is then replayed and the role player volition spawn back into free mode outside the mansion gate.
Replay on Hard Mode
One time the player spawns back into free style they have 48 minutes (real time) from completion of the previous heist to trigger a new heist to activate Difficult Mode. Note that exiting the game does non freeze the timer.
Pavel volition send a text explaining that he will message the player when it is safe to endeavor the heist again. This follow-upwardly text arrives afterward approximately 10 minutes (real fourth dimension), leaving 38 minutes to activate the planning screen and pay the $25,000 gear up-up fee to trigger Difficult Mode on the next heist.
Rewards
Afterwards the mission is completed, the concluding payout is calculated based on the value of the chief target, the total amount of secondary targets each participating crew member brought back - gradually reduced if the fellow member takes damage during the mission, or greatly reduced if they are forced to respawn with a team life. A bonus is added to the full, if the mission's Aristocracy Challenges are successfully completed, which is modified by the difficulty the mission was conducted under. Subsequently the get-go playthrough, the payout is further reduced by costs - Pavel's 2% cutting, and the Madrazo Dare'southward 10% fee for fencing the boodle.
Primary Target
The difficulty of the heist impacts just the value of the primary target. With the exception of the first playthrough, each target in subsequent runs has a set value for completing the heist on normal difficulty, only an increased value if the player undertakes the heist on hard difficulty.
| Main Target | Image | Value | Value on hard |
|---|---|---|---|
Sinsimito Tequila Chiliad 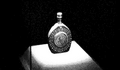 | 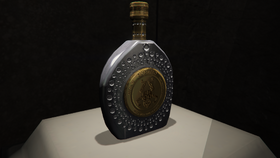 | $900,000 | $990,000 |
Reddish Necklace G  |  | $i,000,000 | $one,100,000 |
Bearer Bonds S  |  | $i,100,000 | $1,210,000 |
Madrazo Files Due south * |  | $i,100,000 | N/A |
Pink Diamond G  |  | $ane,300,000 | $1,430,000 |
Panther Statue Chiliad †  |  | $1,900,000 | $2,090,000 |
* denotes the target for the first playthrough, cannot exist encountered on subsequent playthroughs.
† denotes the target is merely available during certain Events.
S denotes the target will be locked in the safe.
Grand denotes the target volition be inside the drinking glass instance.
Secondary Targets
The post-obit table denotes the full value of each secondary target (most per stack), and the corporeality that each histrion tin can acquit of each in their loot purse:
| Target | Image | Take (any difficulty) | Weight (in loot bag per stack) | Maximum numbers of secondary targets (to fill the loot bag) |
|---|---|---|---|---|
| Greenbacks |  | $78,480-$89,420/Cash stack stash | 25% | four ($313,920-$357,680 total) |
| Artwork |  | $176,200-$199,700/Painting | l% | 2 ($352,400-$399,400 full) |
| Weed | 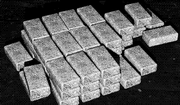 | $145,980-$149,265/Weed brick stash | 37.5% | two.67 ($389,280-$398,040 total) |
| Cocaine |  | $220,500-$225,000/Cocaine brick stash | 50% | 2 ($441,000-$450,000 total) |
| Aureate |  | $328,584-$333,192/Gold bar stash | 66.7% | one.5 ($492,876-$499,788 full) |
An additional $50,000 to $99,000 can be stolen from the safe in El Rubio's role inside the compound. Note that it does non accept up space inside the lootbag.
Full loot
The theoretical maximum boodle on the island would full over $7,119,000, however the iv-player carry limit ways the maximum payout would be significantly less:
| MAXIMUM | i player | 2 players | 3 players | four players |
|---|---|---|---|---|
| Master | $two,090,000 | |||
| Secondary | $499,788 | $499,788 | $499,788 | $499,788 |
| Safe | $99,000 | |||
| Gross take | $2,688,788 | $three,188,576 | $3,688,364 | $4,188,152 |
| Fence fee 10% | $268,879 | $318,858 | $368,836 | $418,815 |
| Pavel fee ii% | $53,776 | $63,772 | $73,767 | $83,763 |
| Net | $2,366,133 | $2,805,947 | $3,245,760 | $3,685,574 |
| Leader max cutting % | 100% | 85% | lxx% | 55% |
| Leader Gross pay | $2,366,133 | $ii,385,055 | $2,272,032 | $2,027,066 |
| Setup fee | $25,000 | |||
| Leader Net | $2,341,133 | $2,360,055 | $2,247,032 | $2,002,066 |
| Player 2 pay | $420,892 | $486,864 | $552,836 | |
| Role player 3 pay | $486,864 | $552,836 | ||
| Player 4 pay | $552,836 | |||
| MINIMUM | 1 player | 2 players | 3 players | 4 players |
|---|---|---|---|---|
| Primary | $900,000 | |||
| Secondary | $313,920 | $313,920 | $313,920 | $313,920 |
| Safe | $50,000 | |||
| Gross take | $1,263,920 | $i,577,840 | $1,891,760 | $2,205,680 |
| Fence fee 10% | $126,392 | $157,784 | $189,176 | $220,568 |
| Pavel fee 2% | $25,278 | $31,557 | $37,835 | $44,114 |
| Net | $ane,112,250 | $ane,388,499 | $one,664,749 | $i,940,998 |
| Leader max cutting % | 100% | 85% | 70% | 55% |
| Leader Gross pay | $1,112,250 | $one,180,224 | $one,165,324 | $1,067,549 |
| Setup fee | $25,000 | |||
| Leader Net pay | $i,087,250 | $ane,155,224 | $i,140,324 | $1,042,549 |
| Histrion 2 pay | $208,275 | $249,712 | $291,150 | |
| Player iii pay | $249,712 | $291,150 | ||
| Player 4 pay | $291,150 | |||
Elite Challenge
- Criteria
- Complete the mission in less than fifteen minutes
- No hacks failed
- Full loot bags
- Void if
- Quick restart used
- Detected
Awards
In improver to the loot payout, several awards grant additional monetary rewards the first time they are achieved.
| Award | Prototype | Unlocked by | Reward |
|---|---|---|---|
| The Cayo Perico Heist |  | Complete the heist for the first fourth dimension. | $200,000 |
| Going Alone |  | Complete the heist with i player. | $100,000 |
| Teamwork |  | Complete the heist with 4 players. | $100,000 |
| Cat Burglar |  | Complete the heist without ever beingness detected. | $100,000 |
| Elitist |  | Complete the Aristocracy Challenge. | $200,000 |
| Accident Difficult |  | Complete the heist on Hard without losing a life. | $200,000 |
| Travel Plans |  | Arroyo the island using all the available vehicle options. | $250,000 |
| Professional Thief |  | Steal all variations of the Primary Target. | $150,000 |
| Go for Gilt |  | Steal El Rubio's prized weapon. | — |
| Ane of Them |  | Enter the chemical compound using a stolen disguise. | — |
Unlocks
- If used for the infiltration method, merchandise price unlocked for:
- Longfin
- Annihilator Stealth
- RO-86 Alkonost
- Vetir
- Kurtz 31 Patrol Gunkhole
- Brioso 300
- If weapons are discovered in the compound:
- Gainsay Shotgun, unlocked for purchase at Ammu-Nation.
- Perico Pistol
- If the "Conspirator" weapon loadout is called, the Military Burglarize volition be unlocked for purchase at Ammu-Nation.
Gallery
Infiltration
")
")
")
Skydiving.
")
Parachuting.
")
")
Guards are not so neutral if the thespian forgets to hire the Weapon Stash and carries their weapons.
")
")
")
")
Longfin smuggler disguise granting neutral guards at Main Dock (Map).
Sabotage
")
Commodities-cutting to access the Control Tower and disable the air defenses.
")
Air defenses hacked.
")
Compound air defenses zone (not disabled by Control Belfry hack).
")
Turning off the power to lights and CCTV.
Chemical compound Entry
")
Active admission points map.
")
Heist leader cutting the grate.
")
Drainage Tunnel, grate cut.
")
Team fellow member waiting.
")
Entry via drainage Tunnel through "pond pool maintenance".
")
")
Collecting the Side Gate access code.
")
Entering the code.
")
Code error.
")
Side Gate access granted.
")
The Demolition Charge counting down on the Main Gate.
")
Outside gate destroyed.
")
A baby-sit staggers out and collapses.
")
Player(south) tempest in.
")
Compound access granted aggressively.
")
Using Grappling Equipment to calibration the South Wall.
")
Going over the peak of the wall.
Looting
Main Targets
")
Elevator access from the role.
")
Keys to the gates dropped, allowing faster access to the vault.
")
Fingerprint scanner in the surreptitious vault.
")
First person view of the fingerprint scan in action.
")
Second role player view of Fingerprint cloning.
")
Accessing the vault through the chain-locked gate.
")
Safe-cracking.
")
Safe opened.
")
Stealing the Madrazo Files.
")
Stealing the Bearer Bonds.
")
Plasma cutting the brandish example.
")
Plasma cutter overheating.
")
Second player view of Plasma cutter in action.
")
The hot rim of the pigsty on completion of the cut.
")
Stealing Sinsimito Tequila.
")
Stealing the Ruby Necklace.
")
Stealing the Pinkish Diamond.
")
Stealing the Panther Statue.
Secondary Targets
")
Dual access keycard in Strickler's role.
")
Preparing to unlock a dual-keycard door.
")
Unlocking.
")
Stealing golden from a dual-keycard storage room.
")
Stealing a painting - cutting it out of the frame.
")
Collecting a cutting painting.
")
Stealing cocaine.
")
Unmarried actor - bags full.
Weapons
")
Marksman loadout.
")
Conspirator loadout.
")
Aggressor loadout.
")
Scissure Shot loadout.
")
Saboteur loadout.
")
Function safe with a free Pistol.
")
")
")
")
Perico Pistol added to the Weapon Bike.
Support Coiffure
")
Heavy weapons Supply Drop.
")
Supply Driblet crate contents.
")
")
Sniper target marked.
")
")
Another target marked.
")
Sniper misses and guard alerted.
")
")
Airstrike performed.
")
Velum smuggler Weapon Stash at the Airfield.
")
Escape
")
Compound active escape routes.
")
Exit via Main Gate.
")
Pushing the manual gate release push button.
")
Escaping the compound.
")
Over the s wall to escape the compound.
")
Going through the keypad gates to exit.
")
Escaped through the keypad gate.
")
")
")
")
")
Attacking the actor escaping in a hijacked Dinghy.
")
Player reaching the Kosatka to escape.
")
Attempting to fly without disabling the air defenses.
")
Escape from the airfield in a Dullard, pursued past Strickler'southward helicopter.
Miscellaneous
")
Uncommonly bad weather.
")
Strickler's Brioso 300 destroyed.
")
")
Dead team fellow member spectator mode.
")
Success!
")
The Madrazo Files destroyed.
")
")
Paying the player.
")
Hard Mode repeat heist activation.
Video Walkthrough
")
GTA Online- The Cayo Perico Heist Finale - Elite Challenge -Solo-
")
GTA Online- The Cayo Perico Heist Finale in Hard Mode - Elite Challenge -Solo-
")
GTA Online- The Cayo Perico Heist Finale in Hard Manner - Elite Challenge -4 Players-
")
GTA Online- The Cayo Perico Heist - Panther Statue -$2,330,610 Reward - Solo-
Changes
With the release of the Los Santos Tuners update, several fixes were fabricated to the Cayo Perico Heist finale:
- Guards have a narrower cone of vision and can react to nearby explosions.
- The Heavy Gunner is no longer vulnerable to headshots or stealth kills.
- Fixed an issue with the keypads located around the compound storage areas, which there were ane.
- Fixed an issue with players being detected by bodyguards/security cameras through certain structures.
- Longfin's speed was reduced, likely to avoid directly shortcuts to the chemical compound.
- Crew members' cuts were removed from the total if they leave/disconnect.
Trivia
- When players reach the compound, they may find English language Dave being held in 1 of the animal cages. He will be muttering or calling out, just will not expose the undetected actor. He will brand comments near the panther, particularly if the muzzle is opened and the panther is missing.
- During the mission, players may sometimes hear Juan Strickler use the island's loudspeakers to inform his guards that his prized panther has escaped and must exist captured. However, while the cage can sometimes be plant empty and its gate open during a playthrough of the heist, players will never encounter the animal around the island or compound, though its growl can be heard anywhere on the island.
- The activity mechanic of removing the grate from the Drainage Tunnel is similar to that from the Grand Theft Car Five mission Monkey Business, in which Michael De Santa had to remove a grate blocking passage into the Humane Labs and Enquiry facility. However, while Michael had express fuel for his cutting torch, players have no restriction on how long to accept during the Finale mission.
- Pavel will comment if the histrion blows up El Rubio's Brioso 300, proverb that "It's a shame we cannot steal it", or that the thespian is revengeful for bravado it up.
- In the cutscenes that play involving the compound'southward side gate keycards, the codes are as follows:
- In the cutscene where the player enters an incorrect lawmaking, brainstorms, and then enters the correct lawmaking, the incorrect code is three-two-1-0, and the correct code is 9-five-4-4, followed by an unknown 5th number that is not shown.
- In the cutscene where the player enters the lawmaking, then hits the keypad, the code is half-dozen-v-6-1-6.
- It is not possible to kill El Rubio'south Panther while its in the cage no affair what weapon or explosive the player uses.
Bugs/Glitches
- If the heist leader gave another teammate a 85% cut of take before starting the heist finale, and asunder or left the transaction screen subsequently completing the finale, the leader could get a 100% cut of accept, and the teammate's take would remain unchanged. This was patched in later updates[i].
- The platinum award for the Fill up Your Bags challenge required the player to obtain $200,000,000 of secondary boodle, as opposed to the incorrectly stated $twenty,000,000, requiring the actor to replay the Cayo Perico Heist at least 500 times to complete. This was patched in later on updates[two].
- In Hard Mode, the primary target may only display the Normal Mode value when added to the take while in the heist mission. This is just a visual glitch, and the player(due south) will still exist paid the target's proper value once the heist is completed.
- When the histrion finishes cut the grate underwater with a cutting torch, the torch will nevertheless be burning while the player puts it back in their duffel bag. This was patched in after updates.
- Occasionally, during a thunderstorm, the lighting may bug, making the thespian's cellphone screen all black and keeping the entire map in a abiding land of yellow-toned effulgence. Lightning flashes volition briefly revert the map'south lighting back to normal.
- When the player managed to hack any of the fingerprint scanners located at El Rubio'due south office or at the underground expanse, the same scanner suddenly moved slightly upwards, leaving the fingerprint cloner fastened to the wall. This was afterwards fixed.
- At times, the condom containing the primary target did non played any sound whenever the player inputs the combination, correctly or non. This was later fixed.
- Rarely, bodyguards or security cameras were able to detect any thespian through certain structures, such equally the lockup near the airstrip and the power station. This was after fixed.
References
- ↑ Tez2 on Twitter
- ↑ Tez2 on Twitter
| Navigation | ||||||||||||||||||||||||||||||||||||||||||||||||||||||||||||||||||||||||||||||||||||||||||||||||||||||||||||||||||||||||||||||||||||||||||||||||||||||||||||||||||||||||||||||||||||||||||||||||||||||||||||||||||||||||||||||||||||||||||||||||||||||||||||||||||||||||||||||||||||||||||||||||||||||||||||||||||||||||||||||||||||||||||||||||||||||||||||||||||||||||||||||
|---|---|---|---|---|---|---|---|---|---|---|---|---|---|---|---|---|---|---|---|---|---|---|---|---|---|---|---|---|---|---|---|---|---|---|---|---|---|---|---|---|---|---|---|---|---|---|---|---|---|---|---|---|---|---|---|---|---|---|---|---|---|---|---|---|---|---|---|---|---|---|---|---|---|---|---|---|---|---|---|---|---|---|---|---|---|---|---|---|---|---|---|---|---|---|---|---|---|---|---|---|---|---|---|---|---|---|---|---|---|---|---|---|---|---|---|---|---|---|---|---|---|---|---|---|---|---|---|---|---|---|---|---|---|---|---|---|---|---|---|---|---|---|---|---|---|---|---|---|---|---|---|---|---|---|---|---|---|---|---|---|---|---|---|---|---|---|---|---|---|---|---|---|---|---|---|---|---|---|---|---|---|---|---|---|---|---|---|---|---|---|---|---|---|---|---|---|---|---|---|---|---|---|---|---|---|---|---|---|---|---|---|---|---|---|---|---|---|---|---|---|---|---|---|---|---|---|---|---|---|---|---|---|---|---|---|---|---|---|---|---|---|---|---|---|---|---|---|---|---|---|---|---|---|---|---|---|---|---|---|---|---|---|---|---|---|---|---|---|---|---|---|---|---|---|---|---|---|---|---|---|---|---|---|---|---|---|---|---|---|---|---|---|---|---|---|---|---|---|---|---|---|---|---|---|---|---|---|---|---|---|---|---|---|---|---|---|---|---|---|---|---|---|---|---|---|---|---|---|---|---|---|---|---|---|---|---|---|---|---|---|---|---|---|---|---|---|---|---|---|---|---|---|---|---|---|---|---|---|---|---|---|---|---|---|---|---|
| ||||||||||||||||||||||||||||||||||||||||||||||||||||||||||||||||||||||||||||||||||||||||||||||||||||||||||||||||||||||||||||||||||||||||||||||||||||||||||||||||||||||||||||||||||||||||||||||||||||||||||||||||||||||||||||||||||||||||||||||||||||||||||||||||||||||||||||||||||||||||||||||||||||||||||||||||||||||||||||||||||||||||||||||||||||||||||||||||||||||||||||||
Source: https://gta.fandom.com/wiki/The_Cayo_Perico_Heist/Finale
0 Response to "El Sueno Mission Again for Alternate Ending Is Unavailable Please Leave Mission Area to Restart"
Post a Comment